If you need help at any time during this process, please contact taxes@clarence-rockland.com or call 613-446-6022.
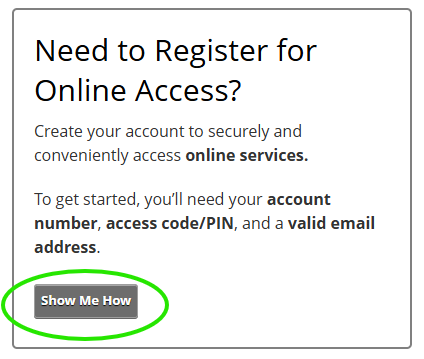
Step 1 – Access the portal
- Visit our Online Services Portal.
- In the Link & Register section, click “Show me how”.
Image
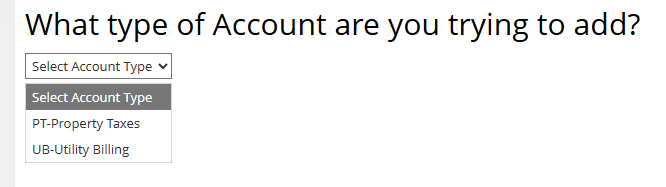
Step 2 – Choose the account you want to add
Select the account you are trying to add. Start with one account, and you can link the other account in the next steps.
Image
To link a Property Tax account (PT)
- Select your jurisdiction from the drop-down menu:
- 016 for Clarence
- 021 for Rockland
- Enter your roll number (last 12 digits only): e.g., 12345678.0000
- Enter your 5-digit Access Code / PIN as indicated on your letter.
If you did not receive a letter by February 23, please contact taxes@clarence-rockland.com to request your access details.
To link a Water and Sewer account (UB)
- Enter your 14-digit account number and your Access Code / PIN, which can be found on your latest water bill.
Step 3 – Set your eBilling preferences
- Please notify me by email that my Property Tax Notice is ready:
Select this checkbox to enable electronic property tax notices.
Then choose a delivery option:
- I will view my Property Tax Notice online:
Default option; you will receive a bill notification email only. - Attach a PDF copy of the Property Tax Notice to the email:
You will receive an email with a PDF copy attached.
A hyperlink to access the tax notice may appear in the email if included by the administrator. - Enter the email address you would like to use for notifications.
Image

Step 4 – Verify your email
- Click Send verification email. A verification code will be sent to you by email.
- Enter the Verification Code.
- Select Save.
Step 5 – Create your login credentials
To create your login credentials, complete the following fields: User Name, Email Address, Password, and Confirm Password.